Difference in size is very obvious
After taking a short break to do a review on Transformers ToyWorld TW-D02: Muddy, I am back to continue working on the PG ABF. Mentioned in the previous WIP, the white parts were given a coat of pearl white from Anchor brand spray can. The color did not come out as expected. I was hoping it would be something like the pearl coating on the PG Wing Zero Custom but it came out like as though it has glitter on the parts. I don't think it can be seen in the photo but it is very noticeable when you look at it in person.
It took some time for me to get use to the outcome and when that happens, I'm liking how the white looks with the candy blue. Now that the armor parts are done, this will be the first time putting on the complete armor for this PG. I do hope it comes out nice.
There are several layers of armors to go onto this kit like the inner frame. Below is a photo of the first layer of armor parts applied onto it.

First layer of armor
With the first layer of armor on, there is little difference in terms of size from the inner frame. From this point on, it is adding bigger pieces of armor onto the frame to complete the leg section of the kit. After some time and torture to the fingers, this is the end result of the leg:


Front and back of the leg


Left and right side view of the leg
I changed the process a little bit this round. I would usually spray the parts, panel line, decals and then do the shading. This time, I did the panel line, decals shading and then sprayed the layer of pearl white on the parts. This process makes the shading looks like as though it has been pre-shaded. After all is done, a layer of Future is applied to the armor parts.
Although most of the inner frames are covered when the armor is on, there are still some exposed inner frames. I just love to see the movements of the inner frame especially when the leg bends.

Working mechanism of the leg
After completing the legs, the feet can then be attached to it.

Parts required to complete leg section
Attaching the feet to the leg is simple. The peg of the leg goes into the polycap and chrome parts on the feet goes into the gold section of the leg. Once everything is assembled, this is the end result of the leg.


Front and back view of the completed leg


Left and right view of the completed leg
From the photos, there are some inner frames visible. For me this is how the Astray should look like instead of a single color frame. Some white, blue, black, gold, gunmetal and light gunmetal colors really compliment each other.
Now for a little photo comparison between the inner frame of the leg and the leg which has its armor put on.
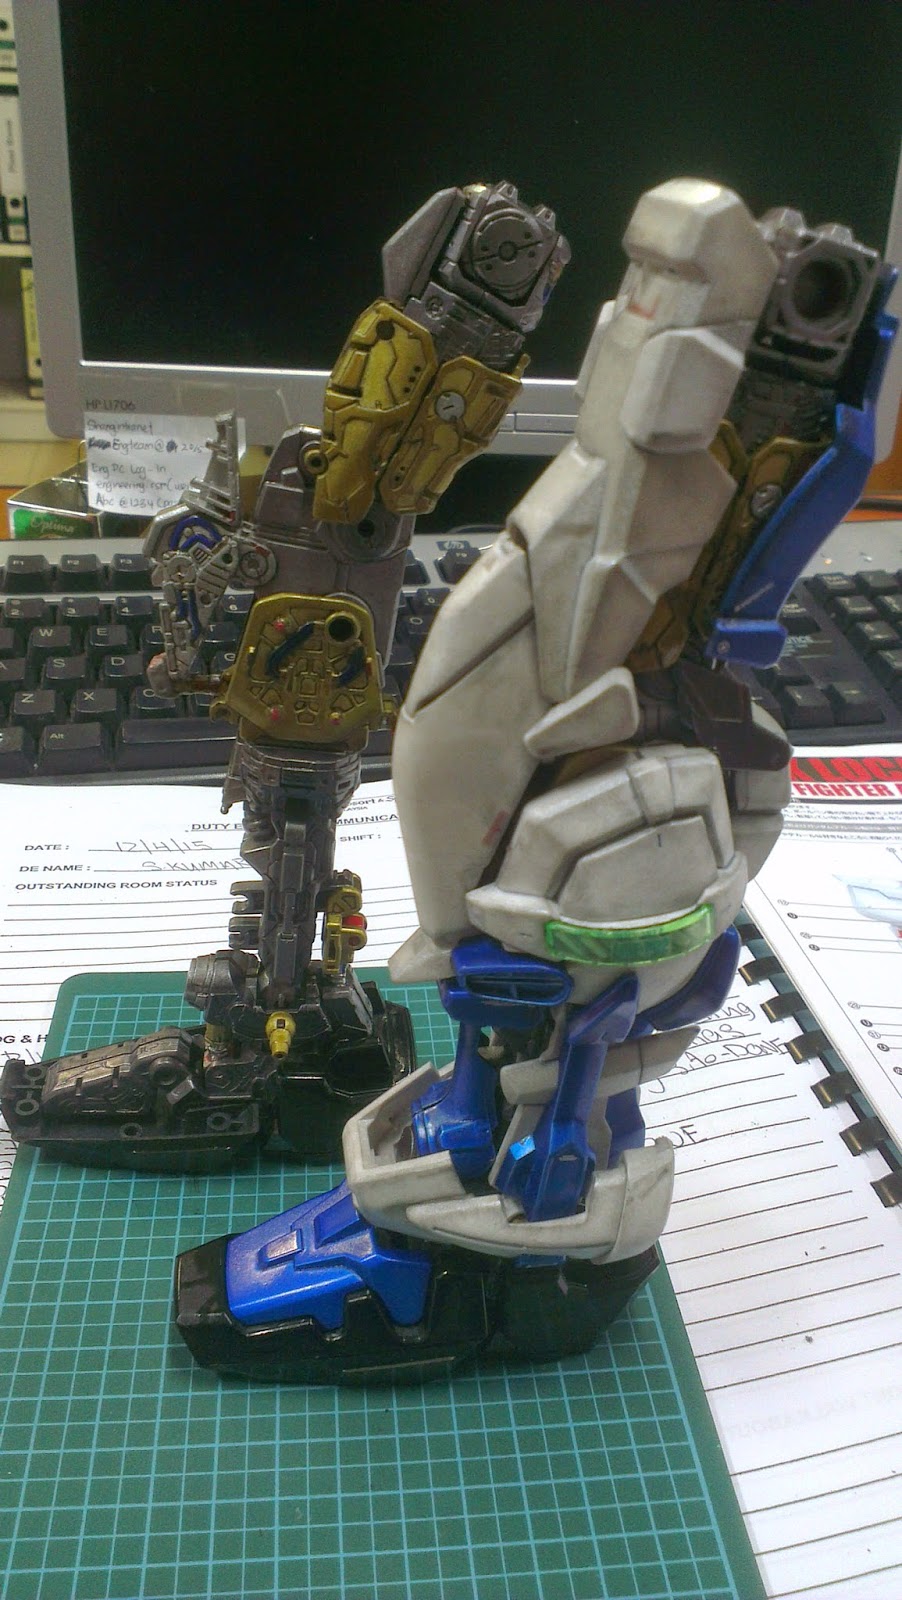


There is a huge difference between the two legs. This clearly shows how much bulk the armor adds on to the inner frame. One looks like it has been starving and the other has had too much to eat. Now that one side of the leg is done, it is time to complete the armor for the other side.

No comments:
Post a Comment